
📋 Table of Contents
According to the American Boat and Yacht Council (ABYC), even a brand-new zinc anode is useless if the electrical resistance between the anode and the hull exceeds one ohm. For owners at Treasure Island or South Beach Harbor, a visible anode doesn’t always mean a protected boat.
Maintaining proper hull-to-anode connectivity is the difference between a clean steel hull and a structural nightmare. While most divers just swap metal and swim away, true steel hull maintenance requires verifying the electrical path that allows electrons to flow. Without this continuity, your boat becomes the sacrificial lamb to the Bay’s highly conductive salt water.
Here is the reality: biofouling on the contact points or paint overspray during haul-outs can effectively insulate your anodes. This creates a “ghost protection” scenario where the anode looks full, but the hull is pitting beneath the waterline. To solve this, we use a rigorous 3-step framework designed for the high-current environments of the San Francisco Bay.
1. Surface Preparation and Mechanical Bonding
The foundation of effective hull-to-anode connectivity starts with the physical interface between the anode and the steel substrate. Here is the thing: if you are mounting a new zinc or aluminum anode over existing bottom paint, you have already failed the connectivity test.
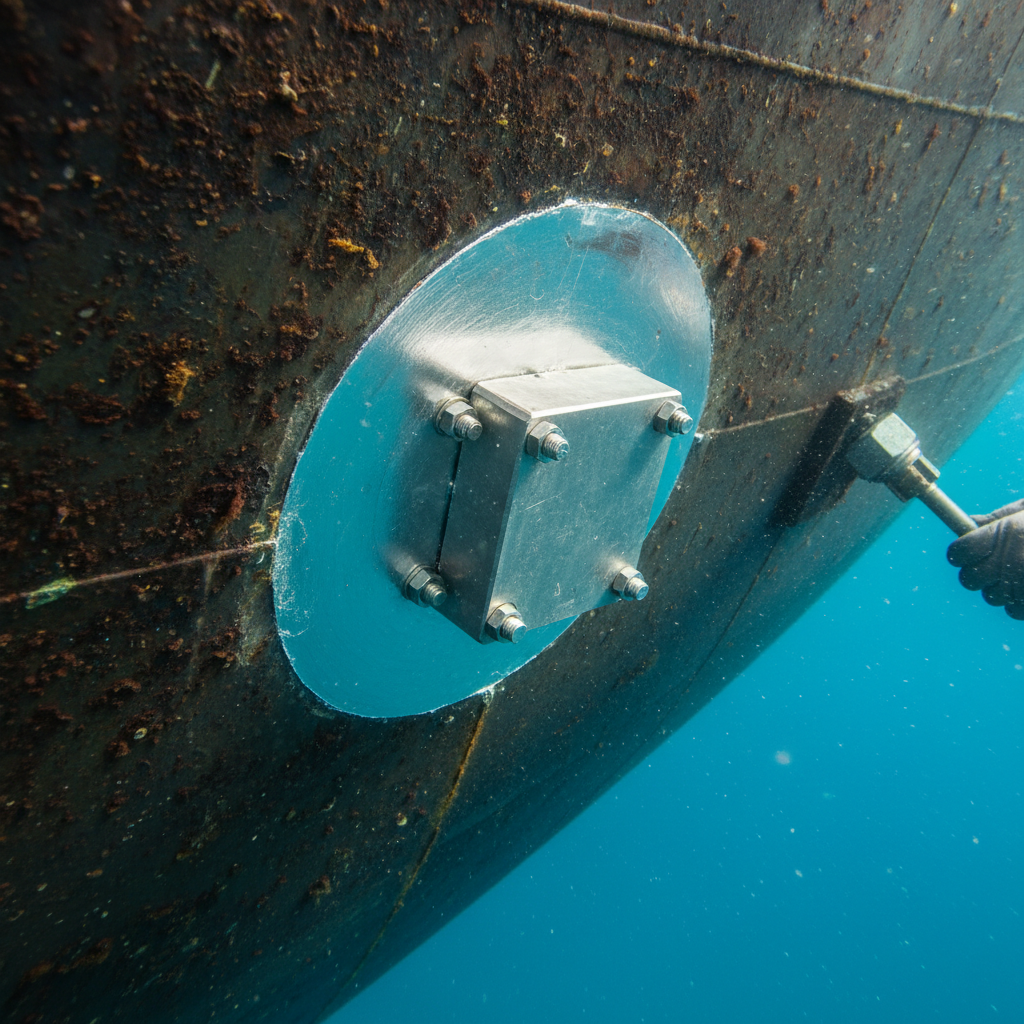
- Substrate Grinding: We ensure a “near-white” metal finish on the mounting studs or hull plate before installation.
- Fastener Integrity: Using 316 stainless steel hardware ensures that the mechanical bond doesn’t vibrate loose in the heavy currents near the Golden Gate.
- Contact Compound: In some high-load scenarios, we apply conductive grease to prevent interfacial oxidation.
What most people miss is that the “hidden drag” factor isn’t just about barnacles; it is about the increased surface roughness caused by micro-pitting when galvanic corrosion mitigation fails. Research suggests that poor cathodic protection can lead to a 10% increase in fuel consumption due to hull degradation. For a typical Bay Area mid-market vessel owner, that is a massive efficiency leak over a single season.
2. Electrical Path Verification and Resistance Testing
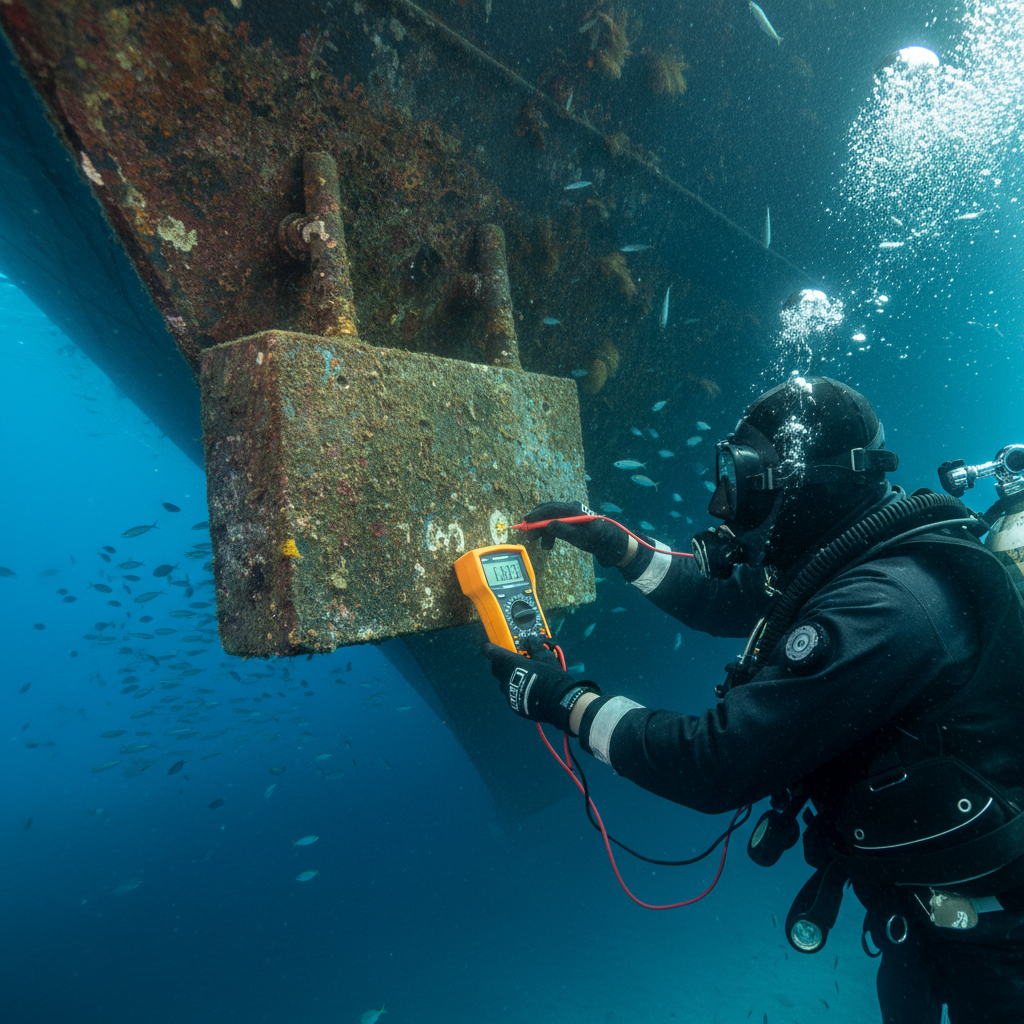
Verification is the only way to prove that your steel hull maintenance plan is actually working. Instead of guessing, we use specialized digital multimeters to measure the hull-to-anode connectivity directly in the water.
- Point-to-Point Resistance: Measuring the ohms between the center of the anode and a known ground on the hull.
- Reference Electrode Testing: Using a silver/silver-chloride (Ag/AgCl) reference cell to measure the hull’s overall electrochemical potential.
- Continuity Mapping: Checking that the rudder, shaft, and keel are all bonded to the same protection circuit.
But wait—testing isn’t just for the initial install. The real kicker is how biofouling impacts Cathodic Protection (CP) efficiency. As calcareous deposits build up on the anode surface, the resistance increases. By monitoring these levels, we can determine if your anodes need a scrub or a full replacement before your next scheduled haul-out at a Bay Area marina.
Need a professional check? Schedule your electrical path verification today to ensure your hull is truly protected.
3. Documentation with Photo Proof and Potential Mapping
Transparency is the rarest commodity in the diving industry, which is why we provide before-and-after photo proof of every service. For owners at Berkeley Marina or Emeryville, seeing the clean metal contact point provides peace of mind that the sacrificial anode installation was done correctly.
- Visual Confirmation: Photos of the cleaned mounting surface before the anode is bolted down.
- Potential Readings: A digital log of your hull’s millivolt readings to track protection levels over time.
- Trend Analysis: Comparing current depletion rates against historical data to predict your next replacement date.
The contrarian insight here? More zinc isn’t always better. Over-protecting a hull (bringing the potential too low) can actually lead to cathodic delamination of your expensive bottom paint. It is a delicate balance that requires precise electrical path verification, not just hanging more metal off the transom.
| System Component | Ideal Resistance | Risk Factor |
|---|---|---|
| Anode to Hull Bond | < 0.2 Ohms | High – Pitting starts immediately |
| Shaft Brush to Shaft | < 1.0 Ohms | Medium – Propeller damage |
| Bonding Wire Jumpers | < 0.5 Ohms | Low – Localized corrosion |
The Role of ICCP and Modern Steel Protection
As we move toward “Green Shipping” standards, many steel-hulled vessels are transitioning to Impressed Current Cathodic Protection (ICCP) systems. These systems use an external power source to drive the protective current, offering more control than traditional anodes. However, even an ICCP system relies on perfect electrical continuity across all hull penetrations.
For large recreational vessels and commercial hulls, optimizing underwater hull maintenance through ICCP can significantly extend dry-docking intervals. By maintaining a smooth, corrosion-free surface, you directly improve your Carbon Intensity Indicator (CII) rating. According to the EPA’s guidance on vessel maintenance, keeping a clean and electrically sound hull is a primary step in reducing environmental impact.
In our work with mid-market maritime operators, we’ve seen that proactive hull-to-anode connectivity checks reduce emergency repair costs by nearly 30% over a five-year cycle. It is a classic case of “an ounce of prevention.”
Why San Francisco Bay Demands Higher Standards
The Bay isn’t a lake; it’s a high-salinity, high-current chemical bath. Stray current from aging marina shore power systems at places like Treasure Island can eat through a steel hull in weeks if the hull-to-anode connectivity is compromised. We recommend monthly inspections during the summer months when biological activity and water temperatures peak.
What most divers miss is the importance of the bonding system inside the boat. If your internal bonding wires are corroded, your external anodes can’t protect the internal through-hulls. Our team looks at the whole picture—from the zinc to the engine block.
Stop guessing about your hull’s safety. View our full suite of underwater maintenance services or call us to discuss your vessel’s specific needs.
Key Takeaways for Steel Hull Owners
- Always grind to bare metal before installing new anodes to ensure a low-resistance electrical path.
- Use a multimeter to verify hull-to-anode connectivity—don’t just trust a visual check.
- Monitor millivolt levels to avoid both under-protection (corrosion) and over-protection (paint damage).
- Document everything with photos to maintain your vessel’s resale value and structural integrity.
Frequently Asked Questions
How often should I check hull-to-anode connectivity?
For steel vessels in high-salinity areas like San Francisco Bay, we recommend a professional inspection every 60 to 90 days. This ensures that biofouling hasn’t insulated the anodes and that the electrical path remains below the critical 1-ohm threshold for effective galvanic corrosion mitigation.
Can I just use more anodes to be safe?
Not necessarily. While more anodes provide more “fuel” for protection, they don’t help if the connection is poor. Furthermore, over-protecting a steel hull can lead to hydrogen embrittlement or paint blistering. The key is quality of connection and correct electrochemical potential, not just total mass of zinc.
What are the signs of poor electrical path verification?
The most common sign is an anode that looks brand new after six months in the water while your hull shows signs of rust or pitting. This indicates the anode is electrically isolated and not sacrificing itself to protect the steel. You may also notice rapid paint failure around underwater fittings.
Does bottom paint affect my anode performance?
Yes, significantly. If bottom paint is applied to the mounting surface where the anode meets the hull, it acts as an insulator. Always ensure the contact points are masked off or ground down to bare metal during sacrificial anode installation to maintain proper connectivity.
Ready to secure your vessel? Don’t leave your steel hull to chance. Contact the experts at 360 Hull Diving for a comprehensive inspection and photo-verified anode service. Request a quote here or call us to schedule your next dive.